Budget AMD Gaming PC
The realm of PC gaming has long been synonymous with high-end hardware and hefty price tags. But for the budget-conscious enthusiast, the dream of a powerful gaming rig feels perpetually out of reach. Thankfully, the tides are turning. Advancements in technology coupled with a competitive market landscape have made building a formidable gaming PC on a budget more achievable than ever.
This guide delves into the world of crafting the ultimate budget AMD gaming PC. We’ll prioritize both performance and value, ensuring you get the most bang for your buck. Here, we’ll not only explore the essential components needed but also delve into the rationale behind each selection, empowering you to make informed decisions.
Why AMD? The Value Proposition
AMD has become a formidable force in the CPU and GPU market, consistently offering competitive products at attractive price points. For budget-minded gamers, their Ryzen processors and Radeon graphics cards provide a rock-solid foundation for a powerful gaming experience. Unlike some other brands that command a premium, AMD delivers exceptional processing power and graphics prowess without the hefty price tag.
The Essential Building Blocks
Before we delve into the specifics of each component, let’s establish a clear roadmap for building our budget AMD gaming PC. These are the key ingredients you’ll need:
- Processor (CPU): The brain of the operation, dictating overall performance.
- Graphics Card (GPU): Delivers smooth and immersive visuals, crucial for a captivating gaming experience.
- Memory (RAM): Ensures smooth multitasking and future-proofs your build.
- Storage (SSD/HDD): A combination of speed and capacity for a well-rounded system.
- Motherboard: The foundation that connects everything together, ensuring compatibility and upgradeability.
- Power Supply Unit (PSU): Provides stable and reliable power, keeping your system running smoothly.
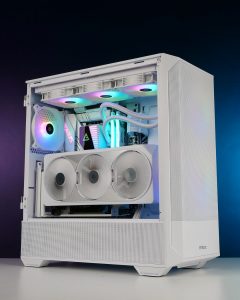
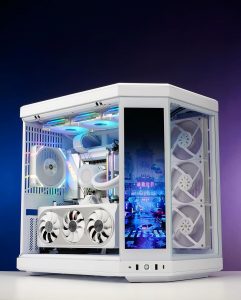
- Case: The housing for your components, contributing to airflow and aesthetics.
- Additional Cooling (Optional): Enhances thermal performance and noise levels for more enthusiast-oriented builds.
In the following sections, we’ll meticulously analyse each component, focusing on affordability and maximizing performance within our budget constraints. We’ll explore specific models with justifications for their selection, empowering you to build a machine that’s both powerful and budget-friendly.
The System
Now that we’ve established the core components needed for our budget AMD gaming PC, let’s dissect each one, keeping affordability and performance in perfect harmony.
Processor (CPU)
The CPU, or central processing unit, serves as the brain of your gaming PC, dictating its overall performance. When it comes to AMD processors for budget builds, the Ryzen 5 5600X emerges as a champion. This 6-core/12-thread powerhouse strikes a perfect balance between price and performance. Here’s why it shines:
- Excellent Core Configuration: With 6 cores and 12 threads, the Ryzen 5 5600X effectively handles modern games without bottlenecking, ensuring smooth gameplay even in demanding titles.
- Impressive Single-Core Performance: Modern games often rely heavily on single-core performance for tasks like physics calculations and AI. The 5600X excels in this area, ensuring a responsive and lag-free experience.
- Future-Proof Potential: While not the most powerful option on the market, the 5600X has the muscle to handle upcoming game releases for a decent amount of time, making it a valuable long-term investment.
Graphics Card (GPU)
The graphics card, or GPU, is the unsung hero responsible for rendering stunning visuals and delivering smooth gameplay. For the budget AMD Gaming PC, the AMD Radeon RX 6650 XT presents itself as a stellar choice. Here’s what makes it a compelling option:
- Solid 1080p and 1440p Performance: The RX 6650 XT tackles most AAA titles at 1080p resolution with high frame rates and delivers a smooth experience even at 1440p in many games.
- RDNA 2 Architecture: This cutting-edge architecture brings features like hardware-accelerated ray tracing and variable rate shading to the table. Ray tracing enhances lighting effects for unparalleled realism, while variable rate shading optimizes performance without sacrificing visual quality.
Memory (RAM)
While gaming doesn’t necessarily require a colossal amount of RAM, having sufficient memory ensures smooth multitasking and future-proofs your system. Here’s what to consider:
- Aim for 16GB DDR4 RAM: This sweet spot offers ample memory for running games and other applications simultaneously without performance hiccups.
- Speed Matters: 3200MHz or Higher: Opt for RAM with speeds of 3200MHz or higher to maximize performance, especially when paired with a Ryzen processor that benefits from faster memory.
- Reliable and Budget-Friendly Options: RAM manufacturers like Corsair Vengeance and G.Skill Ripjaws offer reliable DDR4 RAM kits at affordable prices.
SSD and HDD
Storage plays a crucial role in boot times, game loading speeds, and overall system responsiveness. Here’s how to achieve the best of both worlds:
- Speedy Boot and Game Loads: 500GB NVMe SSD: For the operating system and frequently played games, a 500GB NVMe SSD is a must-have. Models like the Kingston A2000 provide lightning-fast boot times and significantly reduce game loading screens.
- Mass Storage for the Rest: 1TB HDD: For storing a large game library, media files, and documents, a 1TB HDD like the Seagate Barracuda offers ample capacity at a budget-friendly price point.
Motherboard
The motherboard acts as the central nervous system, connecting all the components of your budget AMD gaming pc and ensuring smooth communication. Here’s what to prioritize for a budget build:
- Compatibility with AMD Ryzen CPUs: The motherboard chipset needs to be compatible with your chosen Ryzen processor. In this case, a B550 chipset motherboard is ideal.
- Feature Set and Upgradeability: Look for a motherboard with essential features like multiple USB ports, fan headers, and potential for future upgrades. The Gigabyte B550 Aorus Elite AX V2 fits the bill, offering a solid feature set at a reasonable price.
Power Supply Unit (PSU)
A reliable PSU is often an overlooked component, but its importance can’t be overstated. It supplies stable power to all your PC’s parts, and choosing the right one is crucial for system health and longevity. Here’s what to consider:
- Wattage Requirements: The total power draw of your chosen components determines the wattage your PSU needs to deliver. Aim for a slight buffer – a 550W PSU from reputable brands like Corsair, EVGA, or Seasonic should comfortably power our build with room for future upgrades.
- 80 Plus Certification: Look for a PSU with at least an 80 Plus Bronze certification. This indicates a certain level of efficiency, meaning less wasted power and a lower electricity bill.
Case
The case houses your components and plays a vital role in airflow and overall aesthetics. Here’s how to find the perfect fit for your budget build:
- Prioritize Airflow: Good airflow is essential for keeping your components cool and preventing overheating. Look for a case with ample ventilation points and strategically placed fans.
- Cable Management Features: A case with built-in cable management features allows for a clean and organized interior, improving airflow and overall aesthetics.
- Finding the Balance: The Cooler Master MasterBox MB511 exemplifies a budget-friendly case that excels in airflow, cable management, and offers a sleek design.
Cooling
While the stock coolers included with AMD processors are sufficient for basic operation, some users might desire enhanced thermal performance and quieter operation. Here’s an optional upgrade to consider:
- Aftermarket CPU Cooler: The Cooler Master Hyper 212 RGB Black Edition offers excellent cooling performance at a reasonable price. It not only keeps your CPU cooler but also adds a touch of style with its RGB lighting, enhancing the visual appeal of your build.
Remember: Upgrading the CPU cooler is entirely optional. If you prioritize a quieter system or plan on overclocking your CPU in the future, then this upgrade might be worthwhile. Otherwise, the stock cooler can handle the base clock speeds of the Ryzen 5 5600X.
We’ve now covered all the essential components needed to build your ultimate budget AMD gaming PC. In the next section, we’ll delve into the assembly process, guiding you step-by-step through putting your creation together.
Assembly
The moment you’ve been waiting for! With all the components meticulously chosen, it’s time to assemble your budget AMD gaming PC. Here’s a step-by-step guide to ensure a smooth and successful build:
Prepare Your Workspace:
- Clear and Spacious Area: Find a clean, well-lit workspace with ample room to lay out all your components.
- Static-Free Environment: Static electricity can damage sensitive electronics. Use a grounding wrist strap or touch a grounded metal object frequently to discharge any static before handling components.
- Gather the Tools: You’ll need a screwdriver set, thermal paste (if using an aftermarket cooler), and zip ties (optional for cable management).
Assembly Steps:
- Install the CPU: Carefully remove the CPU from its packaging and locate the socket on the motherboard. Align the CPU with the socket’s markings and gently lower it into place. Secure the lever or latch to hold the CPU firmly.
- Apply Thermal Paste (Optional): If using an aftermarket cooler, apply a pea-sized amount of thermal paste to the centre of the CPU’s integrated heat spreader (IHS).
- Mount the CPU Cooler: Follow the manufacturer’s instructions to secure the cooler onto the motherboard, ensuring proper contact with the CPU’s IHS. Tighten the screws evenly to avoid uneven pressure.
- Install the RAM: Locate the RAM slots on the motherboard. Consult your motherboard manual for the correct configuration (often dual-channel mode for two RAM sticks). Gently insert the RAM sticks into the slots, ensuring they click into place securely.
- Prepare the Case: Remove the side panel of the case and place the motherboard carefully onto the mounting points. Secure it with screws according to the motherboard’s manual.
- Install Storage Drives: Locate the designated drive bays in your case for the SSD and HDD. Mount them securely using the provided screws. Connect the SATA data and power cables from each drive to the motherboard’s corresponding SATA ports and power connectors.
- Connect the Power Supply: Install the PSU into the designated slot in your case. Connect the main 24-pin ATX power cable to the motherboard. Identify the other power cables (CPU power, PCIe power for the GPU, SATA power for drives) and connect them to their respective components based on your PSU’s manual and component specifications.
- Install the Graphics Card: Carefully remove the graphics card from its packaging. Locate the PCIe x16 slot on the motherboard and gently insert the graphics card. Secure it with a screw to the case.
- Connect Peripherals: Connect your monitor, keyboard, mouse, and any other peripherals to the available USB ports on the back of the case.
- Double-Check Connections: Before powering on the system, take a moment to meticulously double-check all connections. Ensure all cables are securely plugged in and no components are loose.
BIOS Setup:
- Connect the Power Cable: Plug the power cable from your wall outlet into the PSU of your budget AMD gaming pc. Flip the power switch on the back of the PSU to the “ON” position.
- Press the Power Button: Press the power button on your case. If everything is connected properly, your system should power on.
- Enter BIOS: During the boot process, watch for on-screen prompts indicating the key to enter the BIOS setup (often DEL or F2). Accessing the BIOS allows you to configure settings like XMP for RAM profiles and fan control.
- Configure BIOS Settings (Optional): Consult your motherboard manual for instructions on navigating the BIOS and configuring relevant settings. Here, you might want to enable XMP profile for your RAM to run at its advertised speed and adjust fan curves for optimal cooling.
Congratulations! You’ve successfully assembled your ultimate budget AMD gaming PC. The next section will guide you through installing the operating system and getting your system ready for gaming.
Gaming
Having built your dream budget AMD gaming PC, it’s time to unleash its potential. This section will walk you through installing the operating system and optimizing your system for a smooth gaming experience.
Installing the Operating System:
- Choose Your OS: Popular options for gamers include Windows 10 and Windows 11. Windows 10 offers a familiar experience and excellent compatibility, while Windows 11 boasts a sleek interface and potential performance improvements (though some games might require additional updates for optimal play). Consider your needs and preferences when making your choice.
- Create a Bootable USB Drive: Download the chosen operating system from the official Microsoft website and use a tool like Rufus to create a bootable USB drive.
- Boot from the USB Drive: Connect the bootable USB drive to your PC and power it on. During boot, press the key to enter the boot menu (often F12 or Del) and select the USB drive as the boot device.
- Follow the Installation Guide: The on-screen instructions will guide you through the installation process. Choose your preferred language, keyboard layout, and configure other settings during the installation.
- Install Drivers: Once the operating system installation is complete, download and install the latest drivers for your motherboard, graphics card, chipset, and other components. These drivers ensure optimal performance and compatibility. You can typically find them on the manufacturer’s website for your specific model.
Optimizing for Gaming:
- Windows Updates: Run Windows Update to ensure you have the latest security patches and performance improvements.
- Graphics Card Drivers: Visit the AMD website and download the latest drivers specifically for your Radeon RX 6650 XT graphics card. These drivers offer bug fixes and performance optimizations for the latest games.
- Game Settings: Once you’ve installed your favourite games, delve into the graphics settings menu. Aim for a balance between visual fidelity and frame rate. Experiment with different settings to find the sweet spot that delivers a smooth and enjoyable gaming experience.
Additional Tips:
- Consider Overclocking (Optional): Overclocking involves pushing your CPU or GPU beyond its stock speeds for potentially higher performance. However, this requires knowledge and carries some risk. Only attempt overclocking if you’re comfortable with the process and have proper cooling solutions in place.
- Monitor Temperatures: Keep an eye on your CPU and GPU temperatures while gaming. Tools like HWMonitor can help you monitor these values. If temperatures reach concerning levels, consider adjusting fan curves in the BIOS or undervolting (reducing voltage for slightly lower performance but cooler operation).
Overview
Congratulations! You’ve not only assembled your ultimate budget AMD gaming PC but also configured it for optimal performance. Now, it’s time to jump into your favourite games and experience the thrill of smooth, immersive gameplay you’ve built yourself. Remember, this guide serves as a foundation. As you delve deeper into the world of PC gaming, you can explore further customizations, upgrades, and fine-tuning to personalize your PC gaming experience even further. Happy gaming!


